Showing posts with label UT Architecture. Show all posts

10.07.2015

Design Build Studio

FIVE MONTHS LATER...the true test has begun.

5 studio + 3 seminar + 1 professor + 1 Jeremy = Green Oak Initiative Materialized.


Step Zero: deconstruct


Step One: get the wood

This was harder than we imagined. After weeks of phone calls to local sawmills, we started the telethon. Each of us was frantically googling sawmills in every surrounding state; we catalogued, pitched the Green Oak Initiative, and finally dropped our phones as soon as Hunter yelled "You all owe me drinks!" 


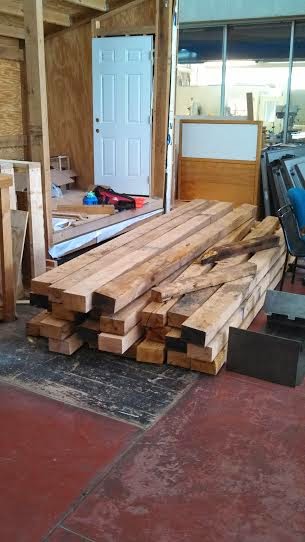
4:30pm Wednesday, September 23, the wood arrived from South Carolina. They told us we had three hours to unload and the clock began as soon as we cut the cants loose. By the time 7:30 rolled around we had sweat drenched t-shirts, several pinched fingers, a bundle of aching muscles, and most importantly we had the wood unloaded into the atrium of the Art+Architecture building. 

No more pretending. Now that we have the main ingredient, we need to build as quickly and carefully as possible because every day that wood shrinks a little bit, so does our window for construction.


Each 14'-16' member weighs in at about 150lbs wet. Thanks to Hunter Todd's home scale we know that one foot of a typical cant weighs exactly 9.85lbs right now.


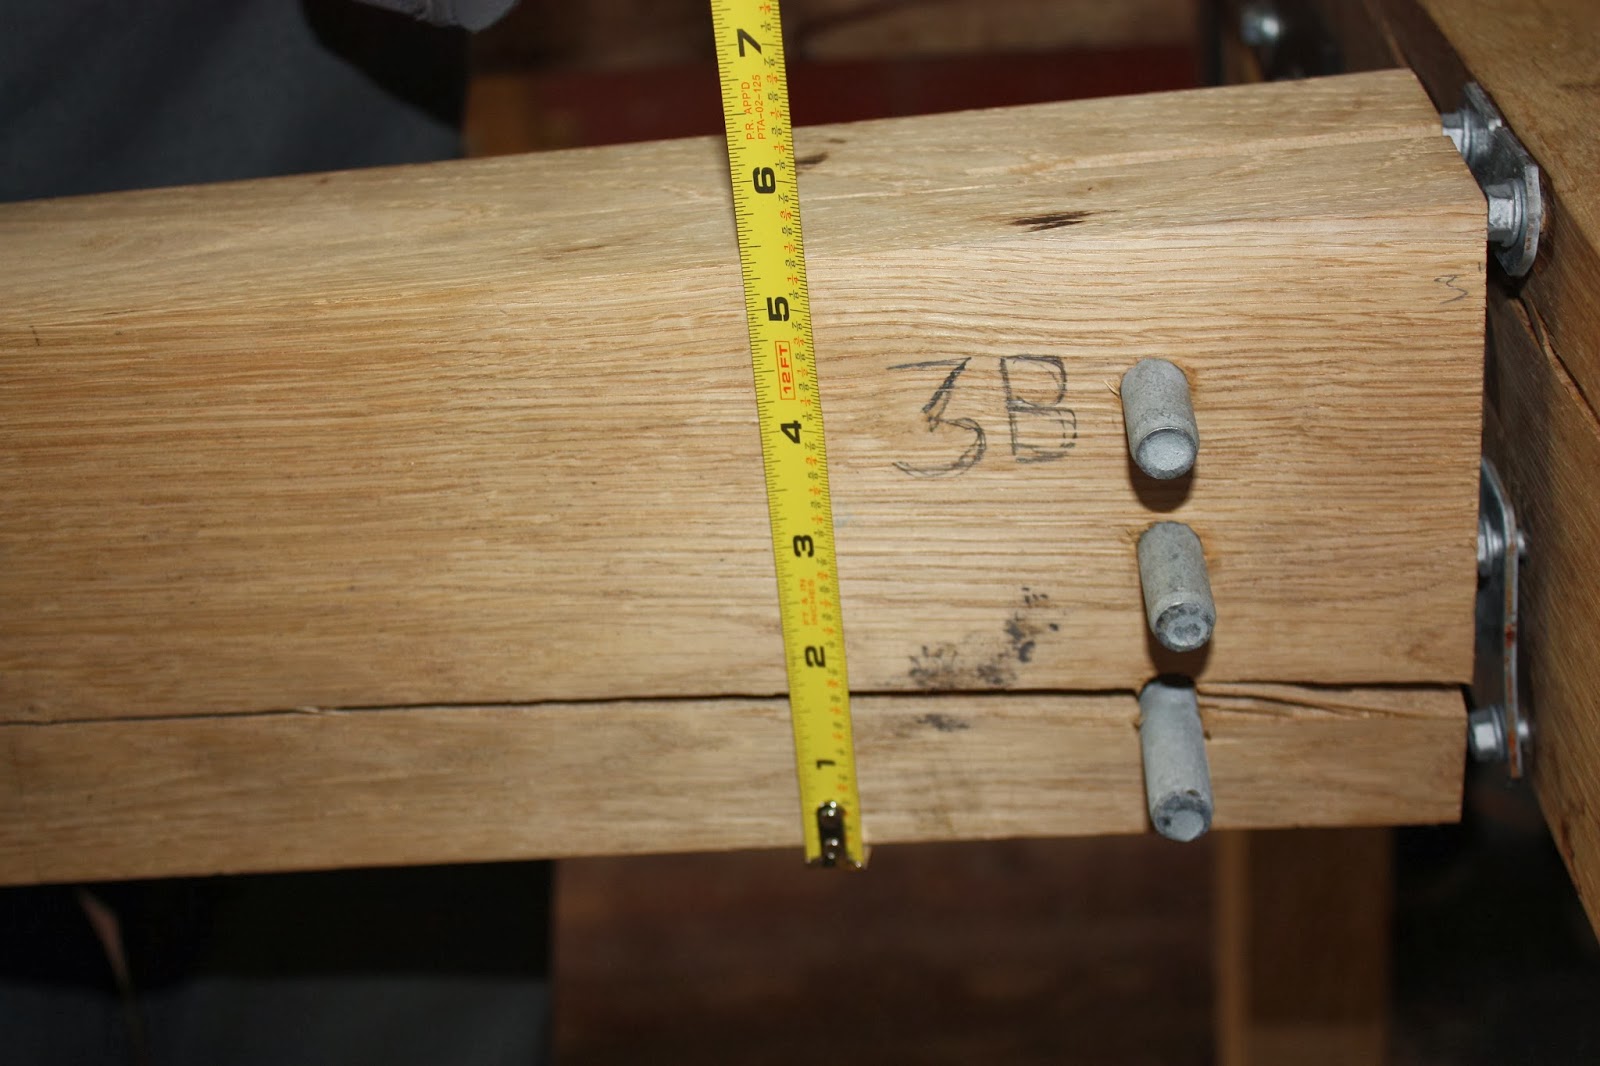
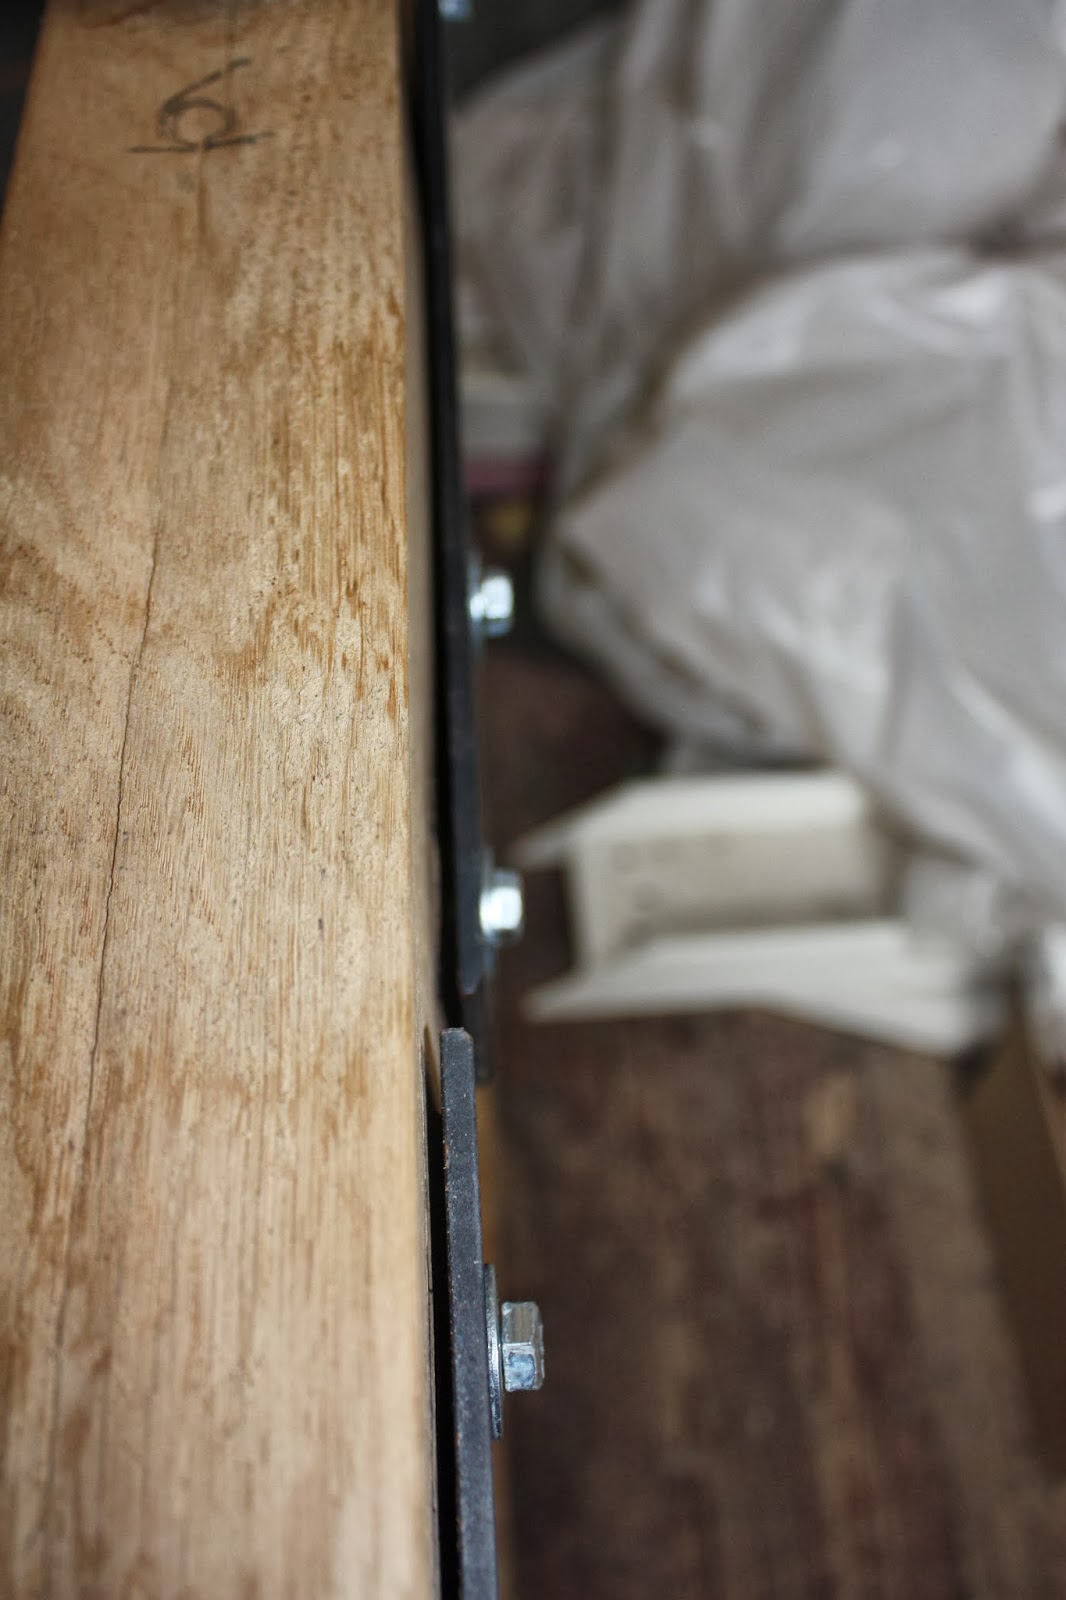
Two weeks into building: two massive bents stand precariously upright before us. We've already encountered one casualty. Lesson learned- metal clamps become weapons when they fall from 16'. The number one rule on the building pad is if this thing starts falling, run away.


4.22.2015

Final Review

On Monday, April 20th 2015, our studio had our final review for our Green Oak Project of a design for a bunk house at Red Bird Mission in Clay County, Kentucky. Reviewers Kevin Stevens and Katherine Ambroziak from The University of Tennessee College of Architecture and Design, as well as Mark Sanderson, one of the Principals at DIGSAU architects in Philadelphia and Brian Court, a partner with Miller Hull Partnership in Seattle, gave us their time, experience, and expertise for a few hours. We presented them with twelve boards, a model, and physical 1:1 scale mockups explaining the work we have done this semester.


They reviewed our research and design and believe that the work we have done looks thorough, competent, and overall like a successful project. They gave us constructive criticism and advice ranging from specific construction methods to presenting alternative ways of thinking about architecture, design, and construction.

Our work this semester seems to have been successful. We still have some things to take care of concerning handing this project over to the next set of students so that they can actually build it. Building it will be the first true test, and then evaluating the building's sustainable design qualities and construction methods. It will take some time to truly validate our work, but we all believe that the work we have done will do some true good for the people of Clay County and for any designers who wish to use our research as a precedent for their own designs.

4.04.2015

Penultimate Review

On Wednesday, April 1st we had our penultimate review.  Bill Martella, James Rose, and Matt Culver were our reviewers and gave us a great critique and great advice that we have already started to implement into our design.

This review covered the previous semester's work with green oak, the site and context, program, research, living building challenge, sustainable strategies, materials, details, and landscape. Having a team of 12 students and a knowledgeable, passionate professor has allowed us to get so much work done. The design is nearly finished and the construction drawings constructions specifications will be finished by our next review on the 20th of April.


3.25.2015

Exterior Mockup

We have one more building mockup completed!  This time we’re looking at how the green oak cants can be used as siding on a building.  With this 1:1 scale mockup, we’re investigating the weathering capabilities of 5/8” thick boards and the fasteners that are used to attach them.  This mockup will use stainless steel screws as well as typical woods screws to get a better idea how the acid in the oak will corrode the different metals.  We will evaluate the structure periodically to look at how ‘fissures’ or cracks may occur along the fastener point where the boards are pinned.

A roughly 4”x6” cant can be milled into 6 boards. We purchased ours cants from United Forrest Products in Morristown, Tennessee, they also milled them down for us.  The great folks were a big help in cutting a small order like ours (48 boards), I think they’re used to cutting quantities like 4,800!

The initial idea for this mockup was a 4x4x8’ box that would be clad in oak boards, using a pattern called reverse board and batten.  The box allows us to simulate the proper air space behind the boards that we would expect in the final project.  The air space is critical as this allows moisture to leave the boards easier after a rain. 


We re-purposed two floor panels that were used in the original green oak exhibit; those 2”x6”s frames are beefy!  


No, Oliver isn't parkouring, he’s fastening in a lot of extra cross bracing.  We decided to build most of the structure inside the Art + Architecture building for the ease of construction and access to the woodshop. It’s too bad that not all construction sites have air conditioning!


No this isn’t a port-a-john! It is the pre-oak-sided box frame being lowered with the help of a UT motorpool truck and its tremendously helpful lift gate.  Just the frame alone probably weighs a little more than three hundred pounds, didn’t I say those 2”x6”’s were beefy!  No problem with five architecture students eager to get their hands dirty! 
  
You can see the house wrap that covers the box.  This is because we wanted to be true to the wall design and prevent water from escaping into the plywood covered frame.  Those 2”x3”s and 2”x4’s you see are called furring strips, in our case, we over sided them to allow us hang the very heavy oak siding without concern.  


Hey it’s looking good!  We've got the boards spaced appropriately and Oliver is putting his finishing touches on the roof.  Why a roof?  Well, want to keep the inside dry.  


And it’s done!! Yes, it may look like an over glorified outhouse but we have bigger plans.  We expect to monitor this mockup over the next three months.  We’re happy to get it up this time in the year where it’ll be experiencing a wide range of temperature changes and precipitation. 

-Paul Attea

3.06.2015

Back To The Hardwood Mill!

I recently took a trip to pick up a batch of freshly cut oak cants for our next building mock-up.  Because cants aren't available in a typical home improvement store, I had to go right to the source: the sawmill.  I took our big UT  Motor pool truck down to Seymour, TN and paid the East Tennessee Wood Products Company, Inc. a visit. 


The visit had been delayed for about two weeks because of the ice and snow, and by the looks of the lumber yard I’m glad we waited.  (I’ll make send my apologies to the UT Motopool employees who had to clean up all the mud in the truck, I’m Sorry!)

Ronald, Mark, and Randy Dixon, the sawmill’s owners and operators, were a great help in humoring us with such a small order.  Randy, who was driving that ridiculously huge machine, helped to flawlessly maneuver the 16’ cants on our 10’ bed.  The wood weighed the truck bed down so much that I didn’t think I’d be able to make it out of the yard!


This research can have a profound impact on these small, owner operated sawmills, who make up the majority of sawmills in the US hardwood industry.  Creating value added solutions for these low grade byproducts means that these ‘mom and pop’ sawmills could draw in more revenue with no change to their typical operations.   

Hopefully these 25 cants should hold us over for a while, now we have some building to do!


-Paul Attea

2.08.2015

Phase II

A new phase for the Green Oak Initiative. A new semester. A new team. Since winning the U.S. EPA Sustainable Design Challenge, we have $90,000 in grant funding for a real-world application. After Phase I's success we can now continue to design and build a full scale building in Phase II.

The primary objectives in Phase II will be:
  • To develop, detail, and construct a full-scale building using green oak pallet cants as structural members.
  • To monitor, record, and analyze the demonstration project for structural, acoustic, and thermal performance over a two-year period as the green oak members dry. (Due to the length of time necessary for drying, only the first part of this monitoring will be supported by the P3 Phase II grant.)
  • To disseminate our findings widely through multiple digital media platforms, peer reviewed publications, design award programs, and programs recognizing the integration of pedagogy and practice such as the NCARB (National Council of Architectural Registration Boards) Award and the ACSA (Association of Collegiate Schools of Architecture) Creative Achievement Award.
This semester will be for designing and creating drawings and specifications for the building. General task for the semester include:
  • Meetings with community partner to identify any shortcomings in the proposed design
  • Detailed climatic and site analysis
  • Detailed code review
  • Target setting for Living Building Challenge (LBC) or LEED Platinum rating as appropriate for selected project
  • Preliminary energy modeling to “tune” envelope and solar apertures
  • Daylighting studies
  • Development of envelope sealing and insulating details
  • Explore potential for sustainable site strategies such as graywater treatment or rainwater harvesting
  • Explore sustainable strategies for interiors such as reducing the use of coatings with VOCs and low energy lighting
  • Development of an outline specification for the envelope, site, and interiors.
  • Refine the drawing set for the demonstration project
  • Provide drawings and specifications to the county code officials in support of the issuance of a building permit
The building will be a cabin at Red Bird Mission's Campus in Beverly, Kentucky. People travel to the campus to assist Red Bird and the local community usually though construction and maintenance projects. During their stay they sleep in cabins on the campus. A new cabin will provide more beds, meaning more capacity for volunteers. The volunteers spend most of their time away working, but when they are on campus they clean up, eat, sleep, and hang out together. We intend for the cabin to provide spaces for washing up, sleeping, and community.

The site

Discussing Red Bird, the site, and the design requirements.

Inside of one of the cabins.

Surveying the site.

We are off to a great start this semester, but we still have a lot of work to do.  


3.12.2014

Gathering it all together

With D.C. looming closer and closer, we are taking steps to gather everything together. Graphics, teeshirt sizes, proposal revisions, and document sorting are happening all around. We have decided to take a diorama that will exhibit our intent and research as well as demonstrate our application to design. This should be an interactive experience for all.


2.09.2014

Simpson Frame

The other type of connection we used for constructing the green oak frame utilized Simpson connection straps and bolts.

FabricationPreparing the green oak members for assembly was easier using a standard metal strap, such as Simpson Strong-Ties. Due to time limitations with the shipping of hardware, we chose to fabricate our own metal straps. This fabrication method can easily be accomplished with standard tools, such as circular saws and drills, because all oak members meet with a flush butt connection. It would be very possible to fabricate and assemble on site. The only problems we ran across in this process was the gumming up of drill bits due to the moisture content of the wood; we were however, still able to efficiently mill down the oak members and set in pilot holes using the metal straps as a template.

ConstructionWith all the oak members ready and labeled, the assembly of the frames was a simple and efficient process. The biggest hurdle we faced was the physical demand of working with such a heavy material. We discovered that the wood is much heavier when green than typical kiln dried or seasoned timbers. We were able to assemble the two bends of the frame on the ground, raise them up on the cart, and attach the connecting joists and ridge beam.  The job definitely required multiple sets of hands in order to hold the frame upright and attach the final connections. Although it was a taxing experience, we were able to refine our method of assembly and envision how, through the use of bracing and cranes, a larger frame could be constructed on site. Prefabrication was also a viable option.

Post-observationsAfter the frame was kiln dried for a month it showed many signs of distortion; This proved to be problematic in combination with the metal strap connections. The radial and tangential shrinkage of the wood was significant. Dropping from 3" x 5.5" to approximately 2.75" x 5.25", the oak shrank up to a quarter of an inch. This led to the wood actually shrinking away from the screws causing the metal plates to pull away from the wood. These simple joint connections were pulled apart due to the shrinkage that caused the joists to move. We had to use a concealed joist tie that set into the center of the oak member. The massive metal dowels created weakness in the smaller sections of the oak member and created a large check along the entire side of the joist. Since we were forced to rapidly dry the frame as a simulation, we were not able to see how the frame would have performed if the connections were maintained and tightened throughout the drying process. We concluded that due to the way the screws reacted to the shrinkage of the wood, strap connections can work but are not optimal when working with green oak construction drying in a kiln.

You can see the gap between the plate and the wood


The shrinkage was so drastic you could fit a pencil inside

This check may have been due to the pins


More shrinkage and movement


You can see the bowing on the beam


Checks down the side of the column